How to set up LLM analytics for ChatGPT

Apr 05, 2024

Tracking your ChatGPT API usage, costs, and latency is crucial to understanding how your users are interacting with your AI and LLM powered features. In this tutorial, we show you how to monitor important metrics such as:

  • Total cost
  • Average cost per user
  • Average API response time

We'll build a basic React app, implement the ChatGPT API, and capture these events using PostHog.

1. Create a React app

To showcase how to track important metrics, we create a simple one-page React app with the following:

  • A form with textfield and button for user input.
  • A label to show ChatGPT output.
  • A dropdown to select different OpenAI models.

First, ensure Node.js is installed (version 18.0 or newer). Then run the following script to create a new React app and install both the OpenAI JavaScript and PostHog Web SDKs:

Terminal
npx create-react-app chatgpt-analytics
cd chatgpt-analytics
npm install --save openai
npm install --save posthog-js

Next, we set up Posthog using our API key and host (You can find these in your project settings). Replace the code in src/index.js with the following:

src/index.js
import React from 'react';
import ReactDOM from 'react-dom/client';
import './index.css';
import App from './App';
import { PostHogProvider } from 'posthog-js/react'
const root = ReactDOM.createRoot(document.getElementById('root'));
root.render(
<React.StrictMode>
<PostHogProvider
apiKey={'<ph_project_api_key>'}
options={{
api_host: 'https://us.i.posthog.com',
}}
>
<App />
</PostHogProvider>
</React.StrictMode>
);

Lastly, replace the code in App.js with our basic layout and functionality. You can find your Open AI API key here.

src/App.js
import React, { useState } from 'react';
import { usePostHog } from 'posthog-js/react'
import OpenAI from "openai";
const models = [
{
name: 'gpt-4',
token_input_cost: 0.00003,
token_output_cost: 0.00006
},
{
name: 'gpt-3.5-turbo-0125',
token_input_cost: 0.0000005,
token_output_cost: 0.0000015
},
]
const App = () => {
const [userInput, setUserInput] = useState('');
const [chatGPTResponse, setChatGPTResponse] = useState('');
const [selectedModel, setSelectedModel] = useState(models[0]);
const posthog = usePostHog()
const fetchChatGPTResponse = async () => {
try {
const openai = new OpenAI({
apiKey: '<your_open_api_key>',
dangerouslyAllowBrowser: true
});
setChatGPTResponse('Generating...');
const chatCompletion = await openai.chat.completions.create({
messages: [{
role: "user",
content: userInput }],
model: selectedModel.name,
});
const response = chatCompletion.choices[0].message.content
setChatGPTResponse(response);
} catch (error) {
setChatGPTResponse(error.message);
}
};
const handleInputChange = (event) => {
setUserInput(event.target.value);
};
const handleModelChange = (event) => {
setSelectedModel(models.filter(m => (m.name === event.target.value))[0]);
};
const handleSubmit = (event) => {
event.preventDefault();
fetchChatGPTResponse();
};
return (
<div style={{ display: 'flex', flexDirection: 'column', alignItems: 'center', justifyContent: 'center', minHeight: '100vh', gap: '20px' }}>
<form onSubmit={handleSubmit}>
<input
type="text"
value={userInput}
onChange={handleInputChange}
placeholder="Type your message"
/>
<button type="submit">Send</button>
</form>
<select value={selectedModel.name} onChange={handleModelChange}>
{models.map((model, index) => (
<option key={index} value={model.name}>
{model.name}
</option>
))}
</select>
<label>ChatGPT Response:</label>
<label>{chatGPTResponse}</label>
</div>
);
};
export default App;

Run npm start to see our app action:

2. Capture chat completion events

With our app set up, we can begin capturing events with PostHog. To start, we capture a chat_completion event with properties related to the API request. We find the following properties useful to capture:

  • prompt
  • model
  • prompt_tokens
  • completion_tokens
  • total_tokens
  • input_cost_in_dollars i.e. prompt_tokens * token_input_cost
  • output_cost_in_dollars i.e. completion_tokens * token_input_cost
  • total_cost_in_dollars i.e. input_cost_in_dollars + output_cost_in_dollars

Update your fetchChatGPTResponse() function in App.js to capture this event:

App.js
const fetchChatGPTResponse = async () => {
try {
// your existing code...
const chatCompletion = await openai.chat.completions.create({
messages: [{
role: "user",
content: userInput }],
model: selectedModel.name,
});
const inputCostInDollars = chatCompletion.usage.prompt_tokens * selectedModel.token_input_cost
const outputCostInDollars = chatCompletion.usage.completion_tokens * selectedModel.token_output_cost
posthog.capture('chat_completion', {
model: chatCompletion.model,
prompt: userInput,
prompt_tokens: chatCompletion.usage.prompt_tokens,
completion_tokens: chatCompletion.usage.completion_tokens,
total_tokens: chatCompletion.usage.total_tokens,
input_cost_in_dollars: inputCostInDollars,
output_cost_in_dollars: outputCostInDollars,
total_cost_in_dollars: inputCostInDollars + outputCostInDollars
})
// your existing code...

Refresh your app and submit a few prompts. You should then see your events captured in the PostHog activity tab.
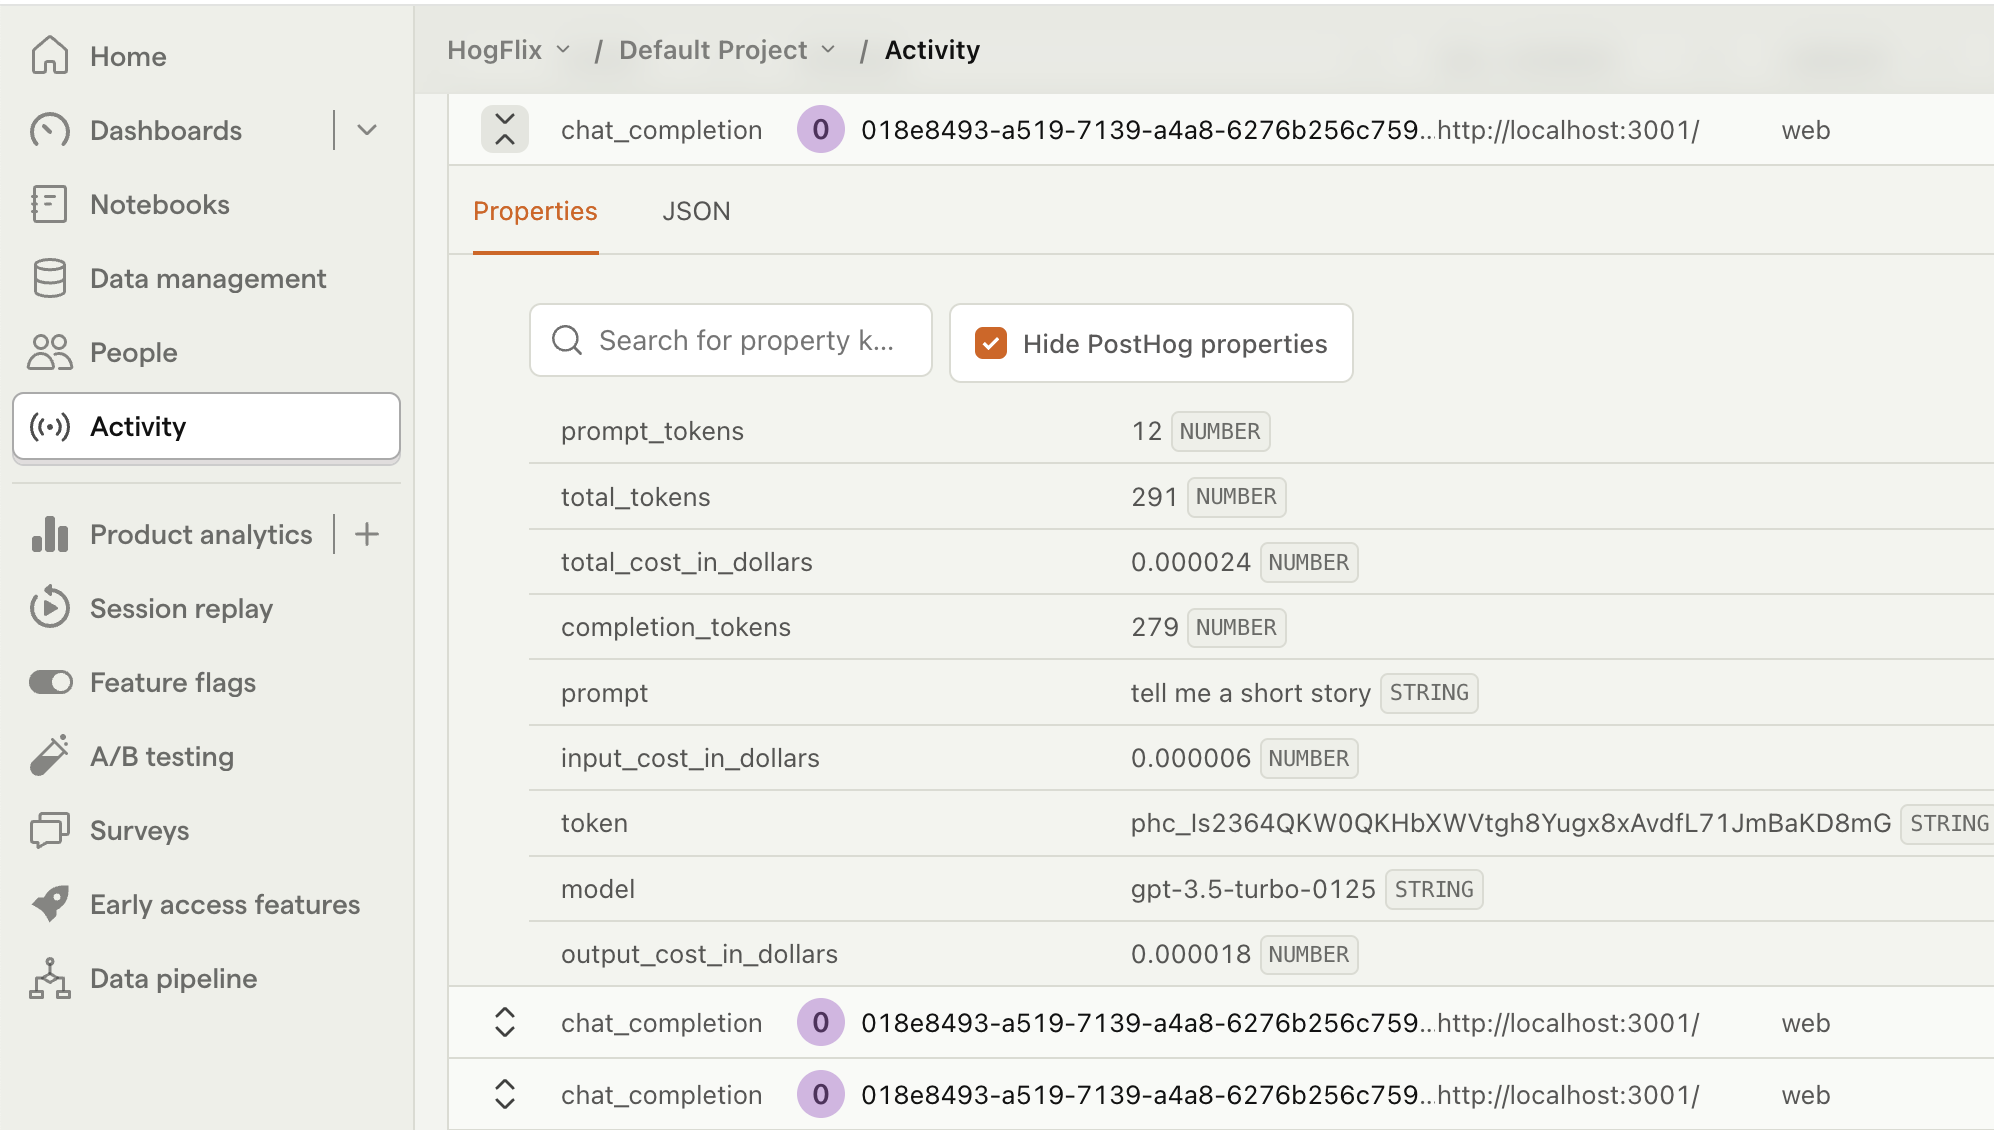
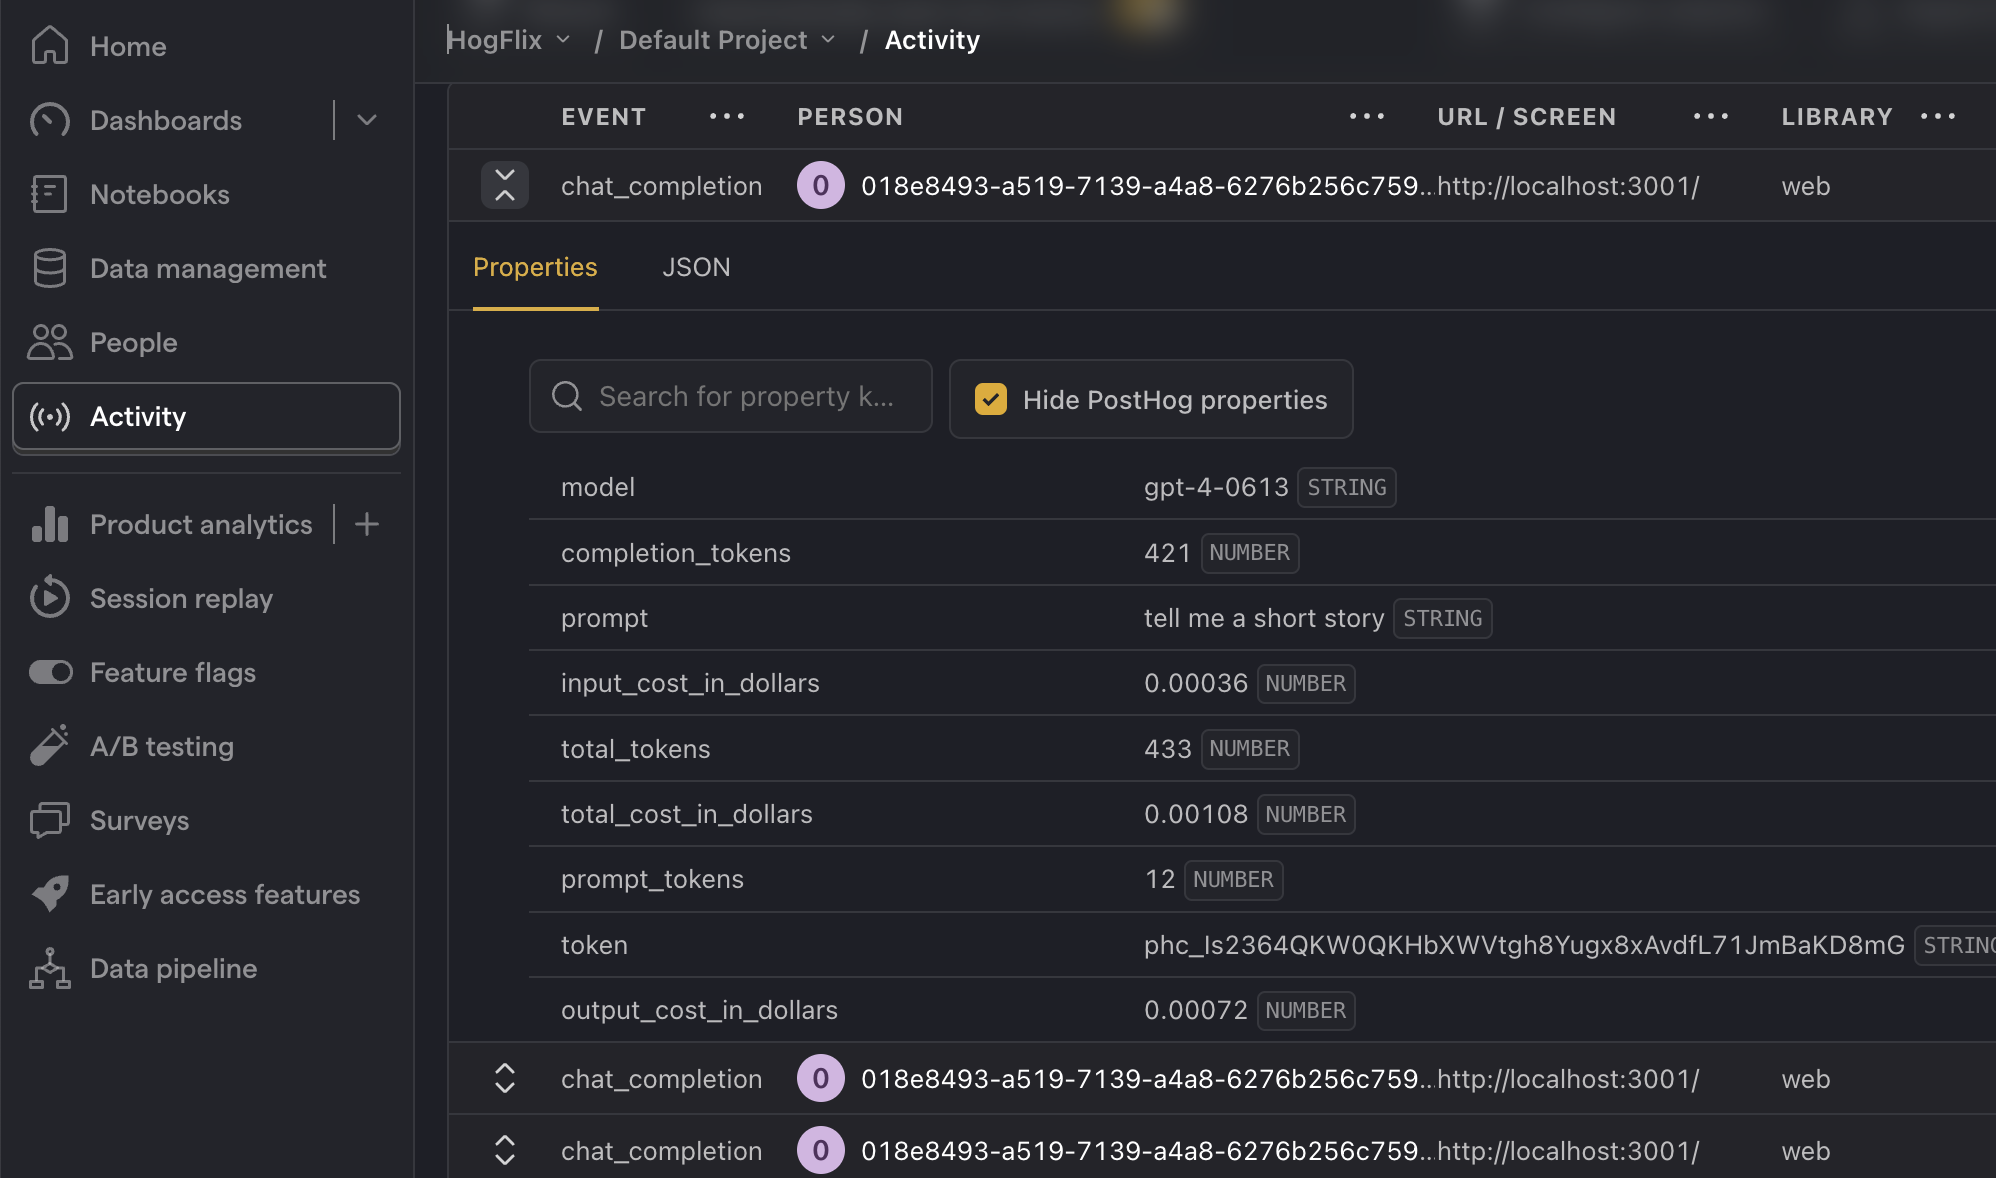
ChatGPT completion events in PostHog

3. Create insights

Now that we're capturing events, we can create insights. Below are three examples of useful metrics you should monitor:

Total cost

To create this insight, go the Product analytics tab and click + New insight. Then:

  1. Set the event to chat_completion
  2. Click on Total count to show a dropdown. Click on Property value (sum).
  3. Select the total_cost_in_dollars property.

Then, change the chart type from Line chart to Number (or however else you'd like to visualize your data). Note that it may show 0 if your total cost is smaller than 0.01.

Additionally, you can also breakdown your costs by model. To do this, click + Add breakdown and select model from the event properties list.
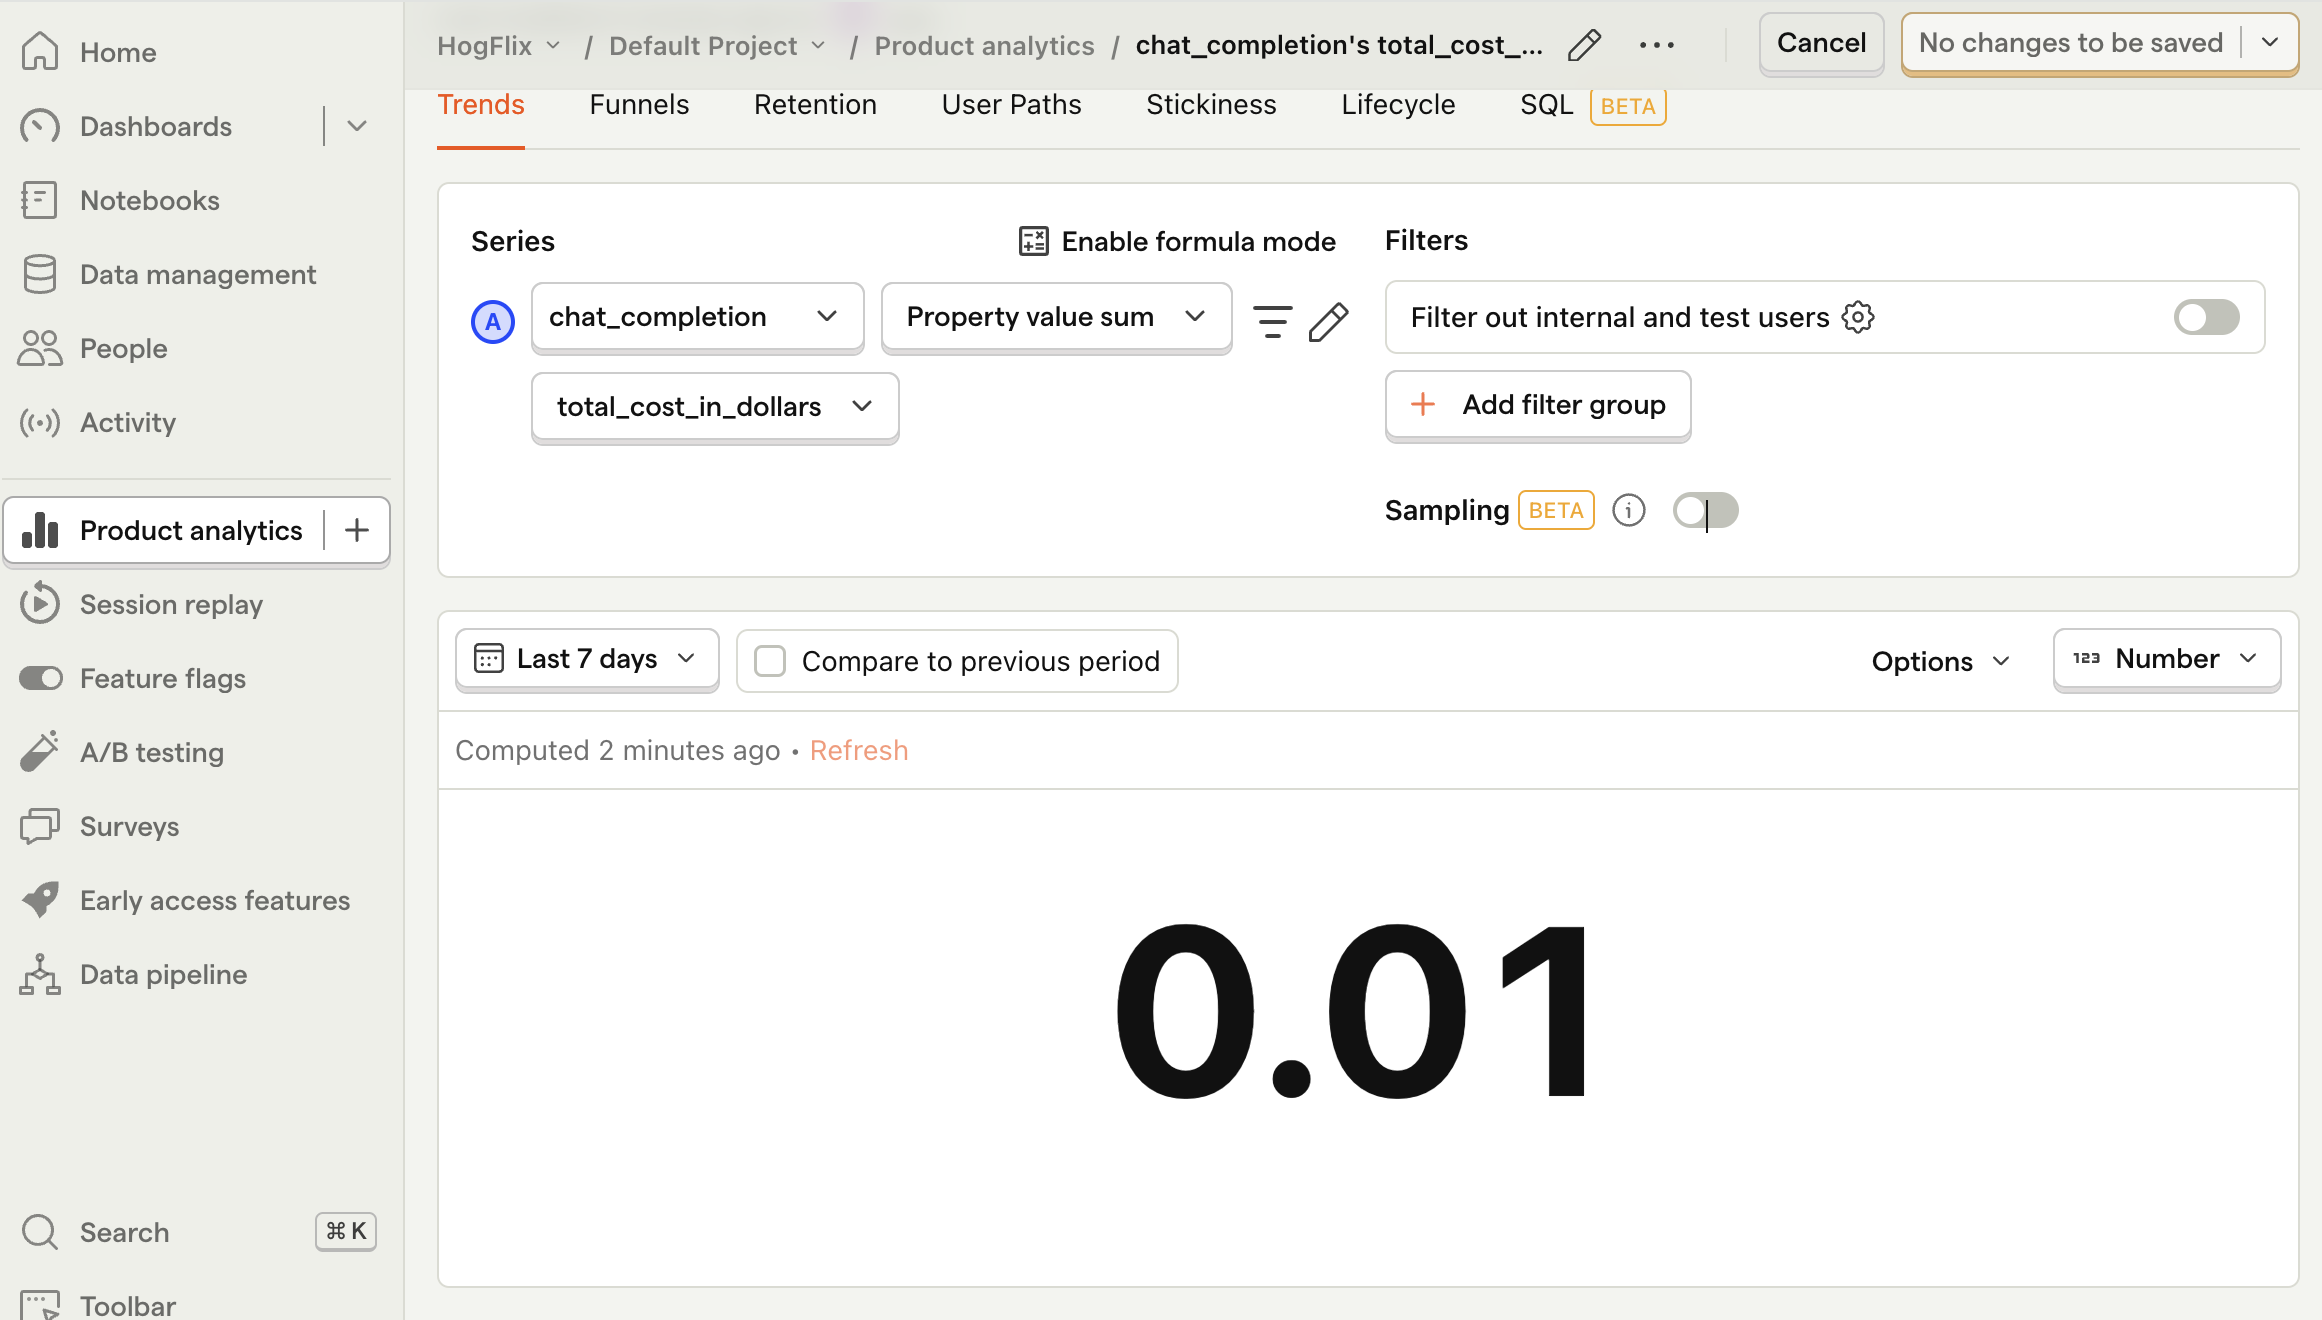
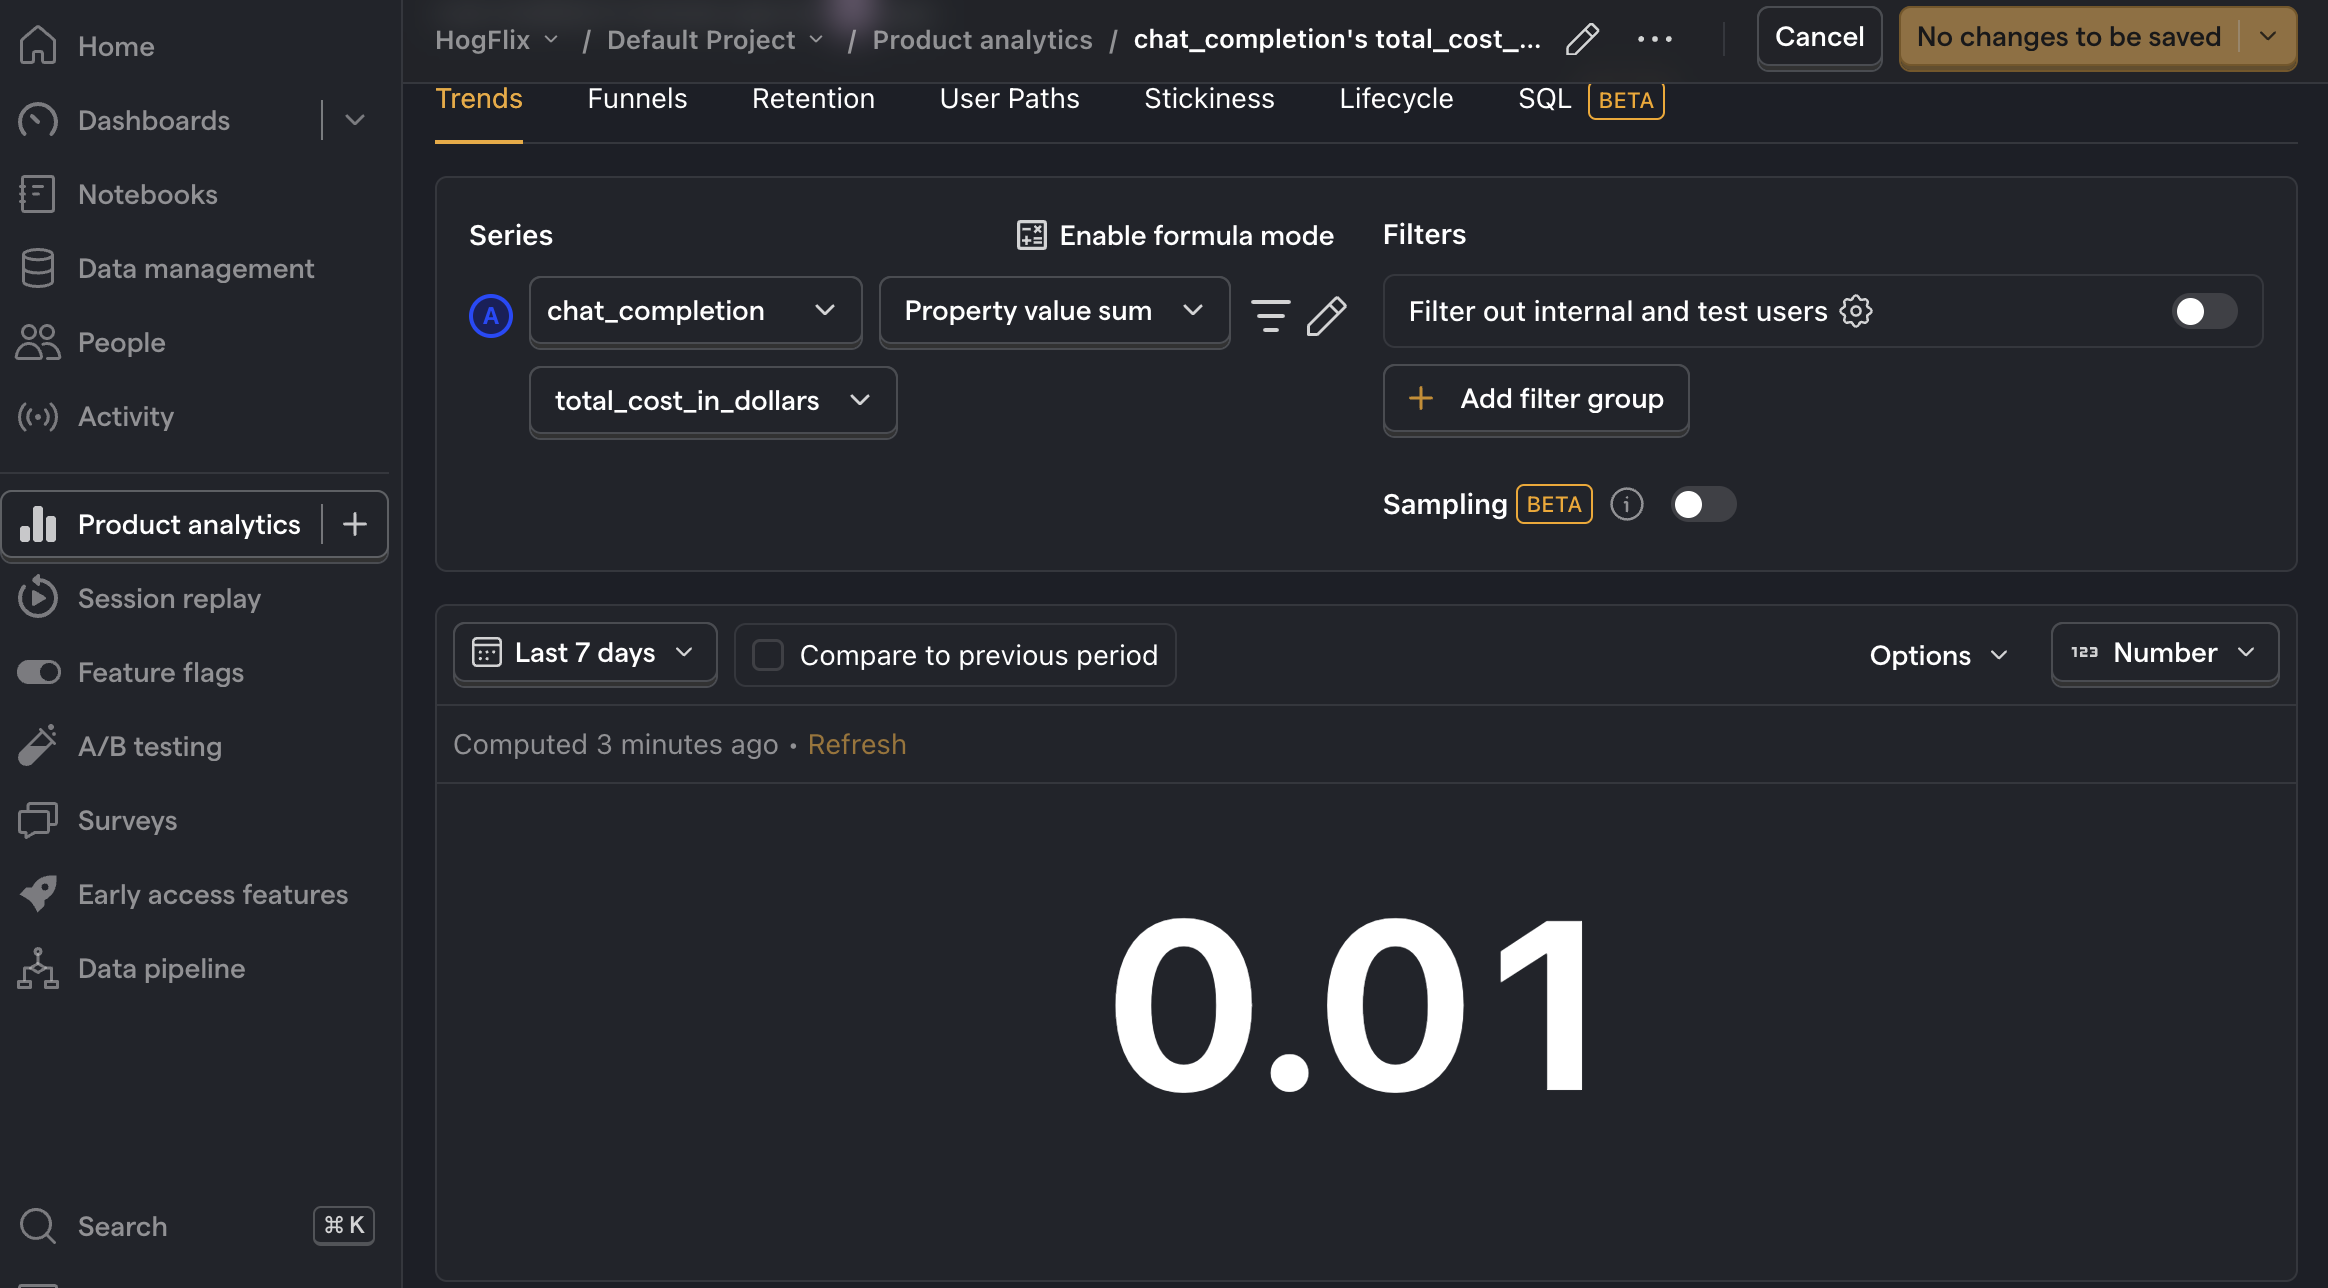
Total ChatGPT model costs in PostHog

Average cost per user

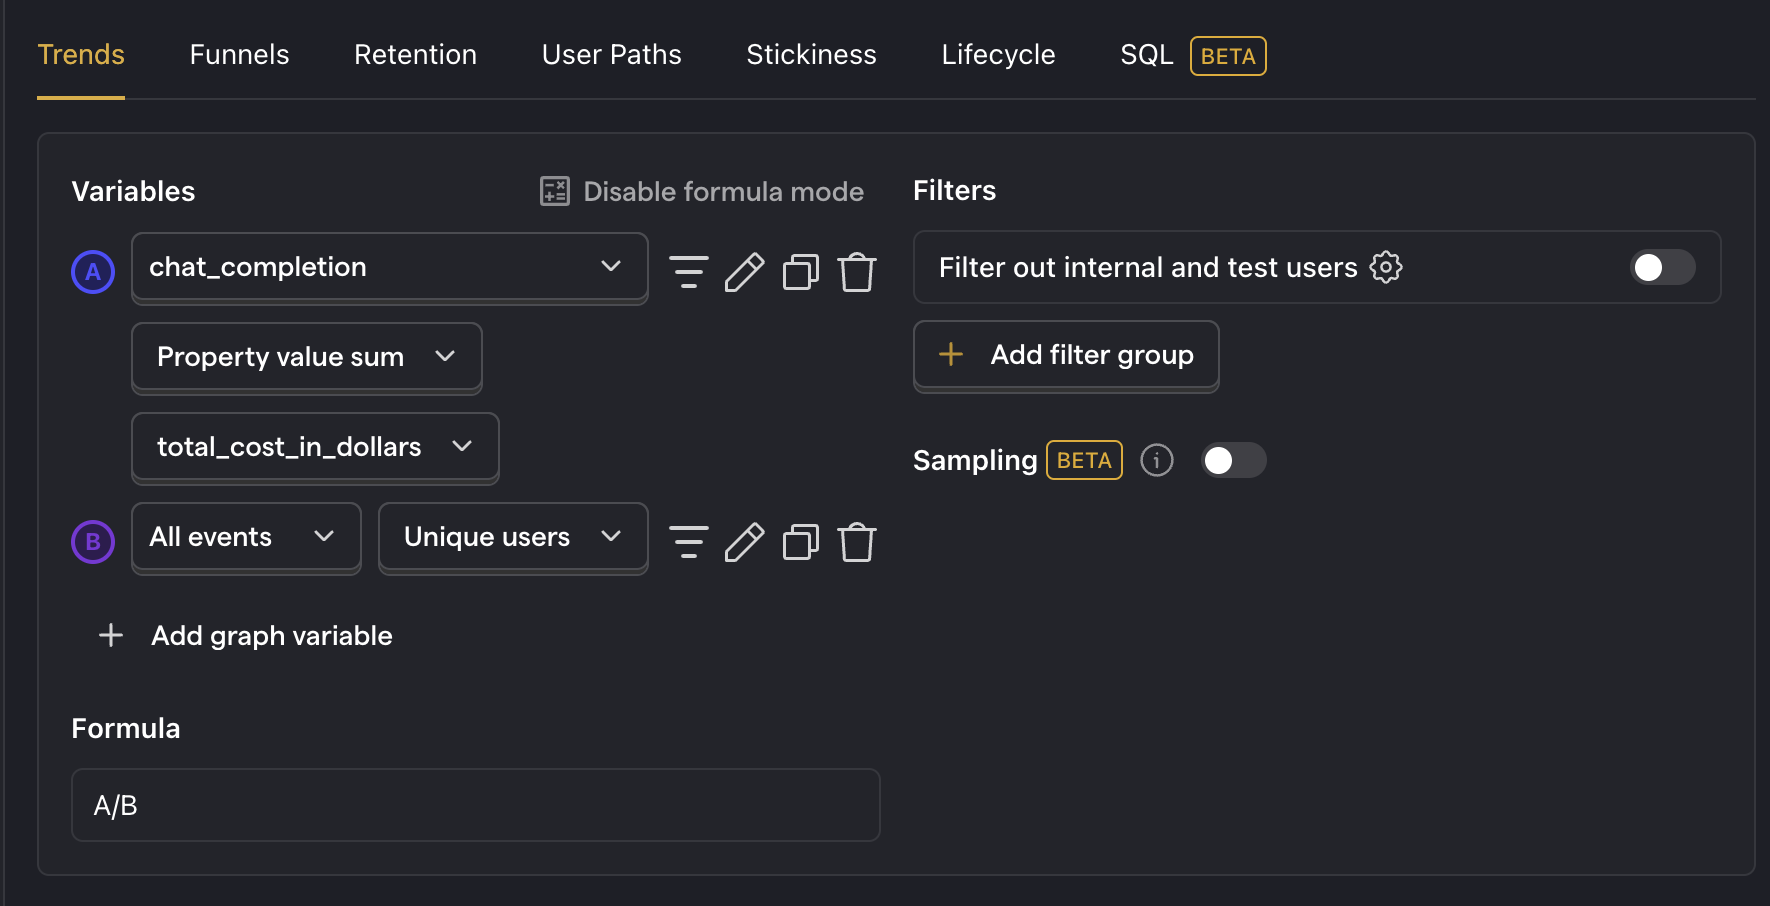
This metric helps give you an idea of how your costs will scale as your product grows. Creating this insight is similar to creating the one above, however we use formula mode to divide the total cost by the total number of users:

  1. Set the event to chat_completion
  2. Click on Total count to show a dropdown. Click on Property value (sum).
  3. Select the total_cost_in_dollars property.
  4. Click + Add graph series (if your visual is set to number, switch it back to trend first).
  5. Keep the event name as All events, but change the value from Total count to Unique users.
  6. Click Enable formula mode.
  7. In the formula box, enter A/B.

Once again, note that it may show 0 if the number is smaller than 0.01.
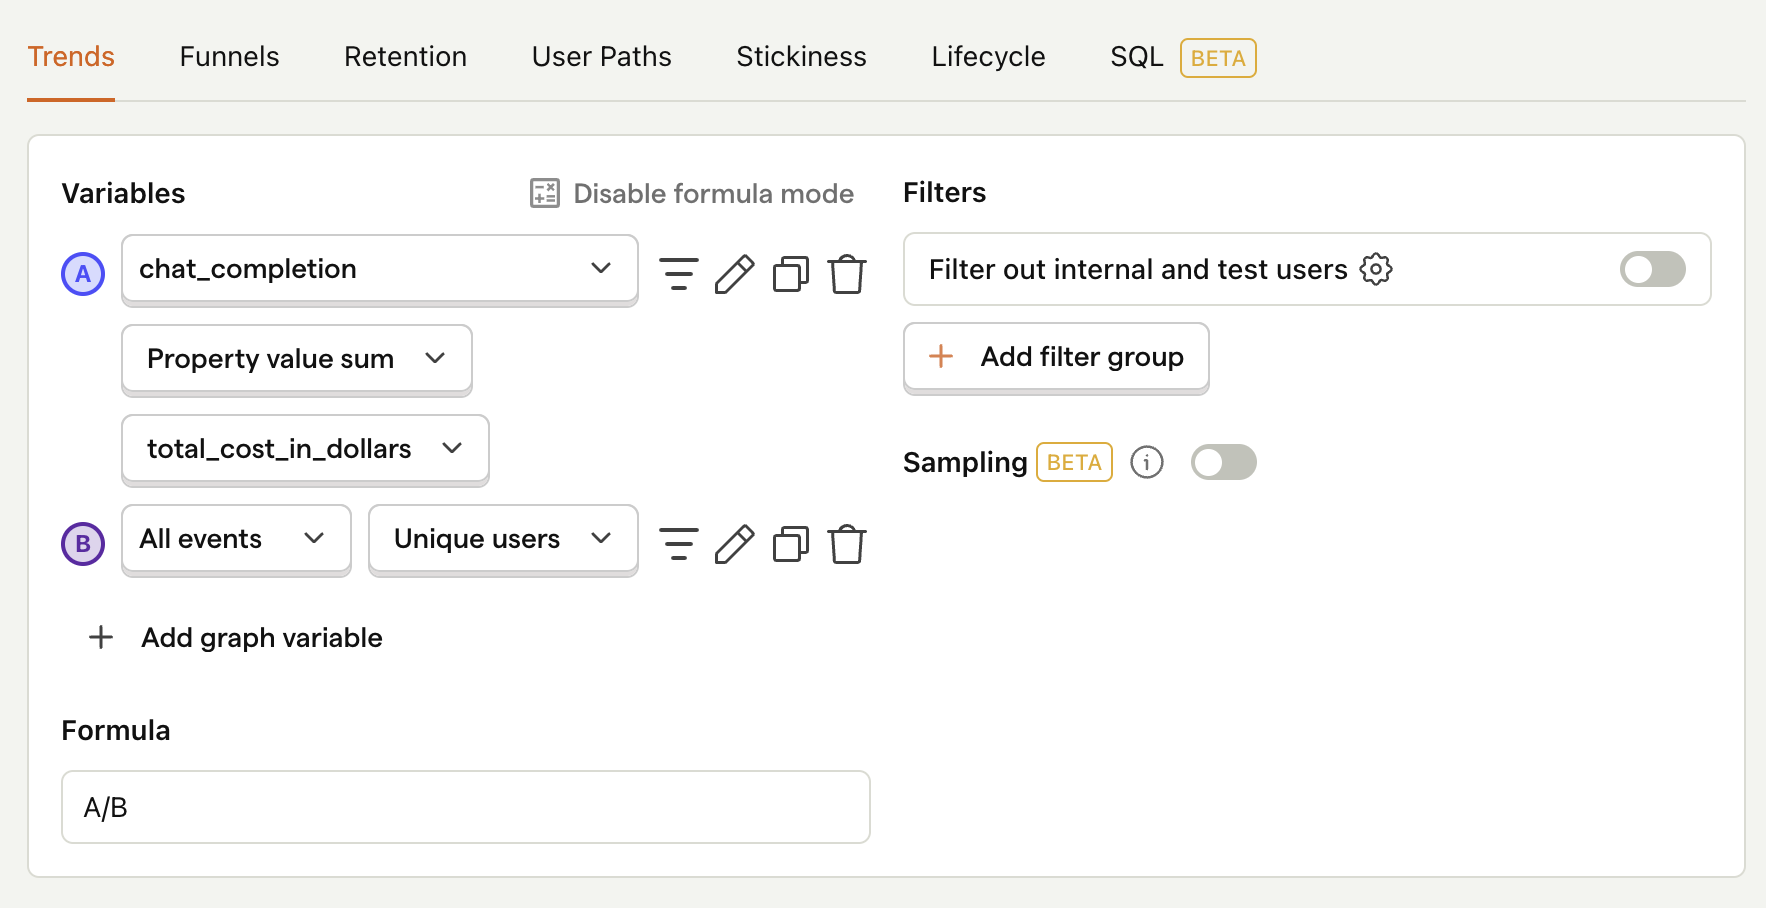
Total ChatGPT costs per user in PostHog

Average API response time

ChatGPT's API response time can take long, especially for longer outputs, so it's useful to keep an eye on this. To do this, first we need to modify our event capturing to also include the response time:

App.js
const fetchChatGPTResponse = async () => {
try {
// your existing code...
const startTime = performance.now();
const chatCompletion = await openai.chat.completions.create({
messages: [{
role: "user",
content: userInput }],
model: selectedModel.name,
});
const endTime = performance.now();
const responseTime = endTime - startTime;
const inputCostInDollars = chatCompletion.usage.prompt_tokens * selectedModel.token_input_cost
const outputCostInDollars = chatCompletion.usage.completion_tokens * selectedModel.token_output_cost
posthog.capture('chat_completion', {
model: chatCompletion.model,
prompt: userInput,
prompt_tokens: chatCompletion.usage.prompt_tokens,
completion_tokens: chatCompletion.usage.completion_tokens,
total_tokens: chatCompletion.usage.total_tokens,
input_cost_in_dollars: chatCompletion.usage.prompt_tokens * selectedModel.token_input_cost,
output_cost_in_dollars: chatCompletion.usage.prompt_tokens * selectedModel.token_output_cost,
total_cost_in_dollars: inputCostInDollars + outputCostInDollars,
response_time_in_ms: responseTime
})
// your existing code...

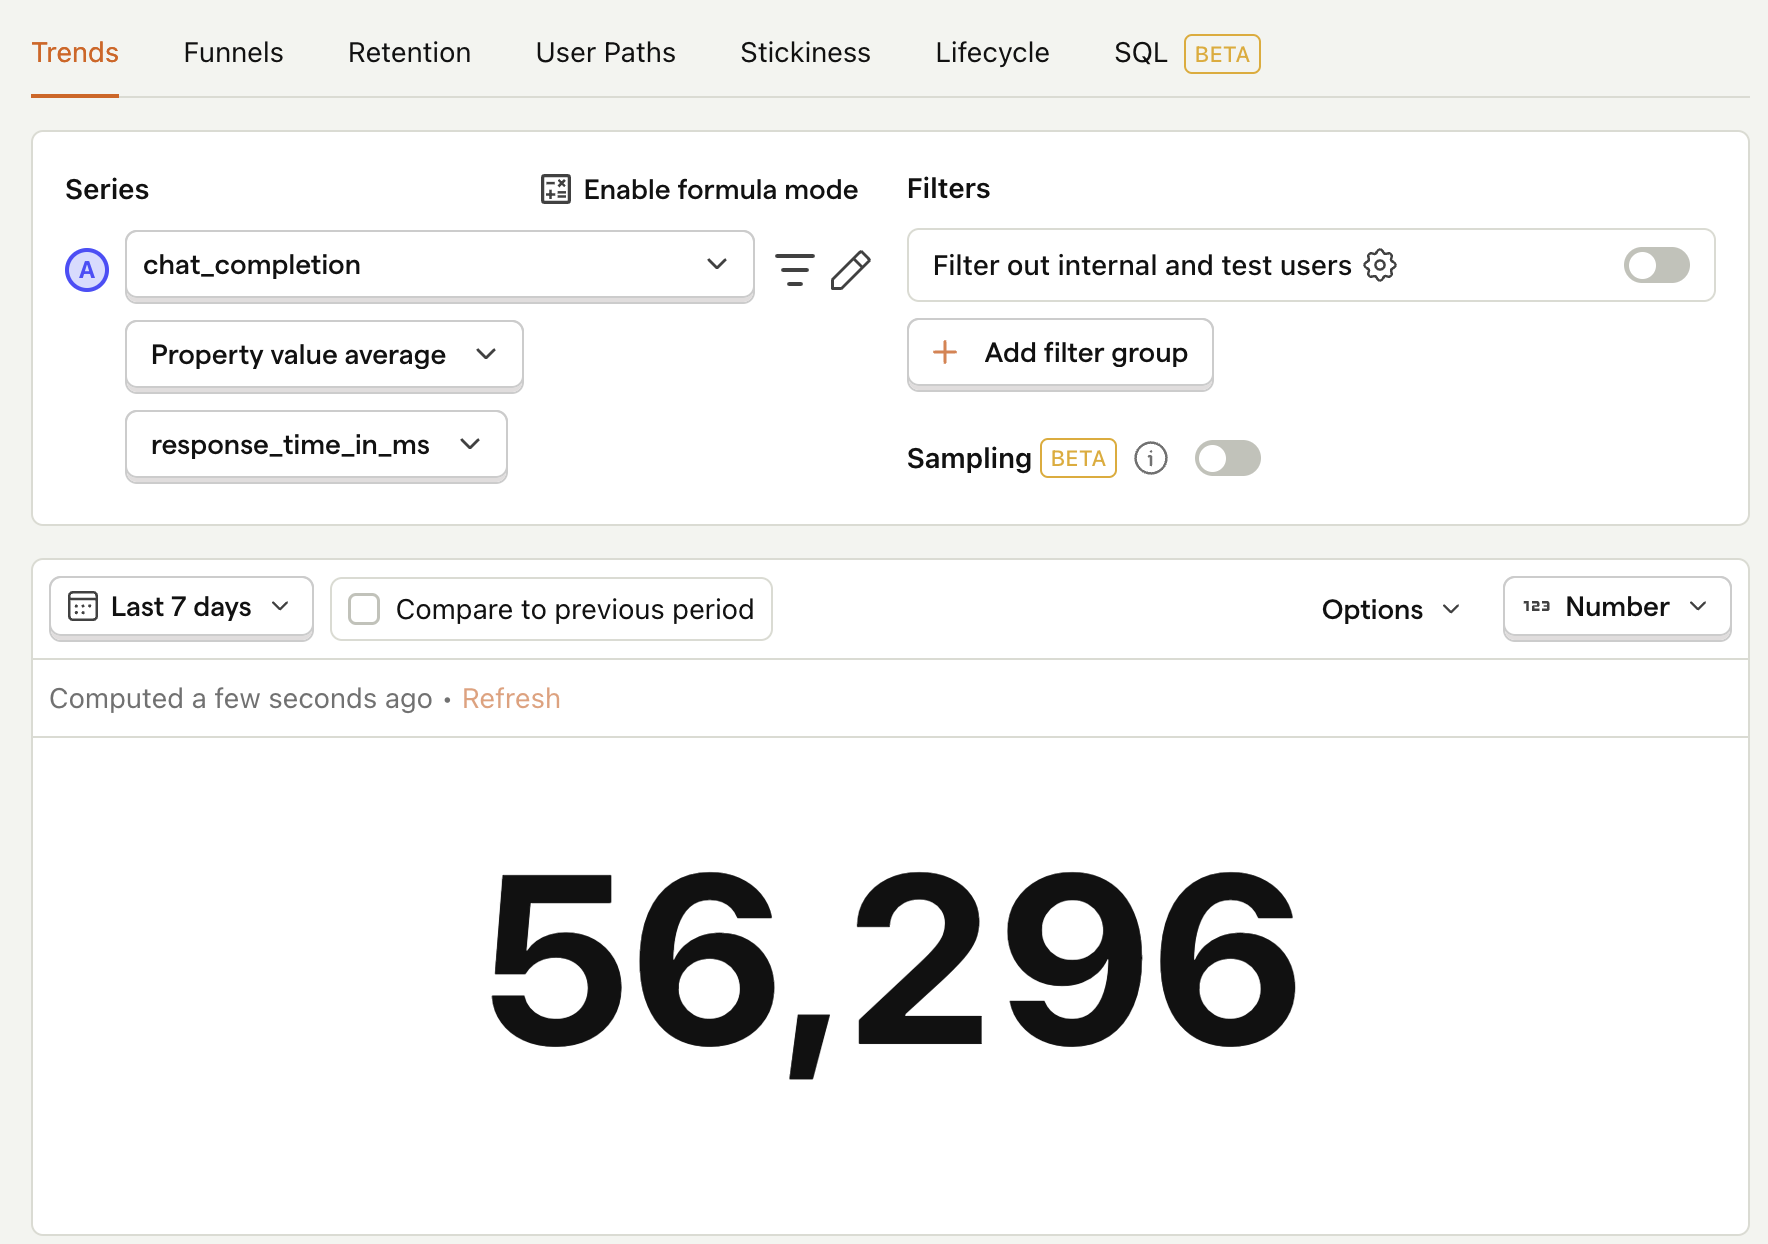
Then, after capturing a few events, create a new insight to calculate the average response time:

  1. Set the event to chat_completion
  2. Click on Total count to show a dropdown. Click on Property value (average).
  3. Select the response_time_in_ms property.
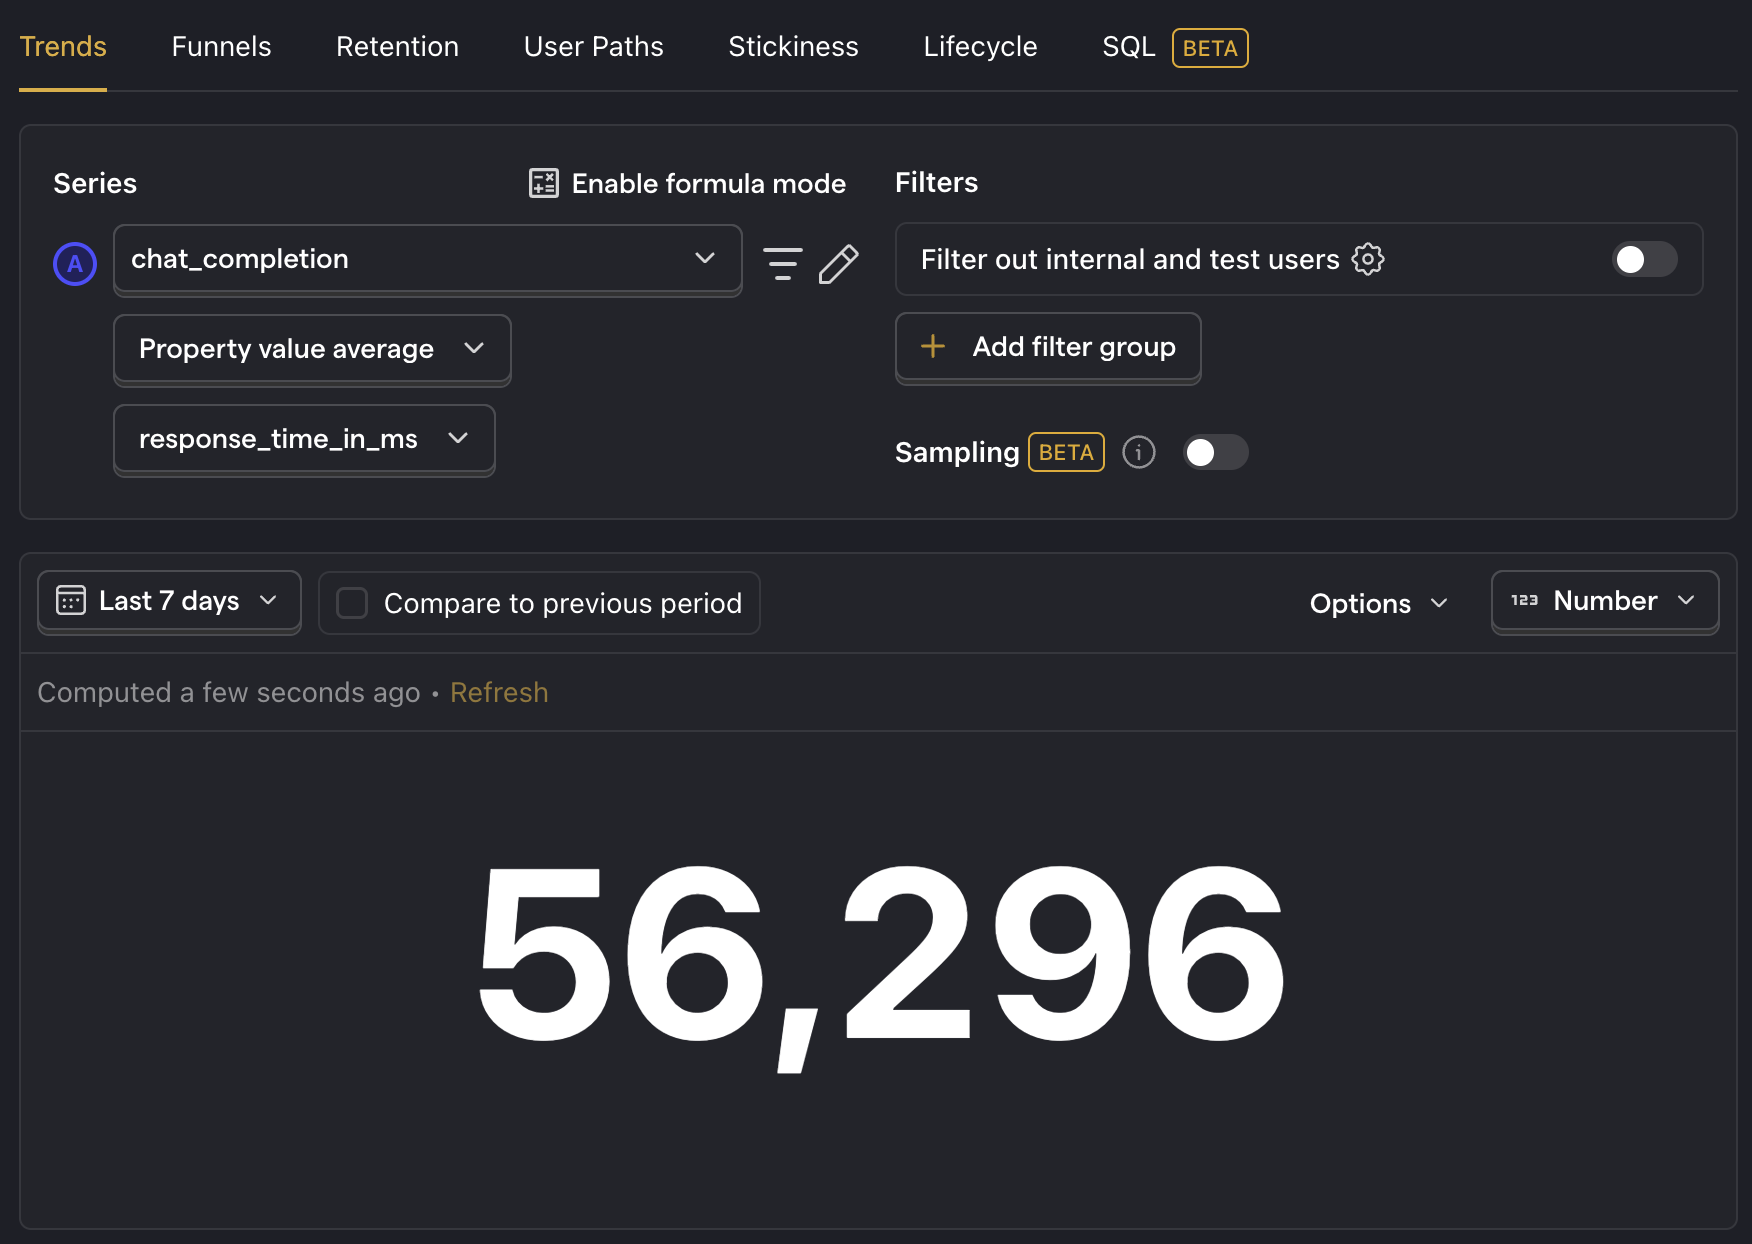
Average API response time in PostHog

Next steps

We've shown you the basics of creating insights from your product's ChatGPT API usage. Below are more examples of product questions you may want to investigate:

  • How many of my users are interacting with my LLM features?
  • Are there generation latency spikes?
  • Does interacting with LLM features correlate with other metrics e.g. retention, usage, or revenue?

Further reading

Comments